











Émissaire du Dragon Révisions de Taborea: 18 août 2026
Collines de Thunderhoof
|
Niveau |
Donneur de quête |
Lieu |
Récepteur de quête |
Lieu |
Objet de jeu |
Infos |
|---|---|---|---|---|---|---|
|
56 |
[Torrog mystérieux] |
Camp de la Colline du Titan |
Aynara |
[Au-delà de la frontière] | Vous êtes téléporté vers le Dragon. | |
|
56 |
Aynara |
Aynara |
[Pas de fumée sans feu] | Écoutez le Dragon parler. Vous êtes ensuite transporté aux Collines de Thunderhoof. | ||
|
56 |
Aynara |
[Samiel Caster] |
Tomara |
[Cochon dans la Mare] | ||
|
56 |
[Samiel Caster] |
Tomara |
Morrok Wallinder |
Camp des Herboristes |
[Changement de plans] | Vous recevez un  [Brin d'herbe] et un [Brin d'herbe] et un  [Bouquet d'herbes inconnues] dans votre inventaire. Faites un clic droit sur [Brin d'herbe] pour obtenir la quête [Les herbes de Morrok], qui vous donne à son tour le titre [Bouquet d'herbes inconnues] dans votre inventaire. Faites un clic droit sur [Brin d'herbe] pour obtenir la quête [Les herbes de Morrok], qui vous donne à son tour le titre  [Fouineur]. [Fouineur]. |
|
56 |
Morrok Wallinder |
Camp des Herboristes |
Morrok Wallinder |
Camp des Herboristes |
[Urgence médicale] | Cliquez sur 6 herboristes blessés dans le camp. |
|
56 |
Morrok Wallinder |
Camp des Herboristes |
Morrok Wallinder |
Camp des Herboristes |
[Un œuf inconnu] | Cliquez sur le grand œuf blanc à côté d'un tronc d'arbre près du camp. |
|
56 |
Morrok Wallinder |
Camp des Herboristes |
Morrok Wallinder |
Au nord du Camp |
[Repaire de wyrms] | Le cadavre du ver repose plus au nord que l'œuf. |
|
56 |
Morrok Wallinder |
Au nord du Camp |
Morrok Wallinder |
Au nord du Camp |
[Au peigne fin] | Trouvez les 3 objets. Corde (67.2/56.4), Empreinte étrange (67.8/55.9), Outil étrange (68.3/56.6). |
|
56 |
Morrok Wallinder |
Au nord du Camp |
Morrok Wallinder |
Dalanis - District de Dimlane |
[L'expert en autopsie du quartier Sombrerue] | Remettez la quête à Morrok. |
|
56 |
Morrok Wallinder |
Dalanis - District de Dimlane |
Morrok Wallinder |
Dalanis - District de Dimlane |
[Comment obtenir des rats imbibés d'huile] | Rendez-vous au Bar de la Nuit à Dalanis et parlez au barman. Vous recevrez de l'huile et un rat. Faites un clic droit sur le rat, puis remettez la quête. |
|
56 |
Morrok Wallinder |
Dalanis - District de Dimlane |
Danny Coblin |
Bar de la Nuit |
[Rencontre avec le roi des armes] | Commandez « Aou » au barman. Un petit gobelet apparaît sur le comptoir - cliquez dessus. |
|
56 |
Danny Coblin |
Bar de la Nuit |
Danny Coblin |
Bar de la Nuit |
[Du grabuge à côté du bar] | Quittez le Bar de la Nuit. 3 Vagabonds apparaîtront et vous attaqueront. Tuez l'un d'eux pour terminer la quête. |
|
56 |
Danny Coblin |
Bar de la Nuit |
Danny Coblin |
Bar de la Nuit |
[Analyse de sang] | Une dague apparaît près du barman. Cliquez dessus et parlez à Carr Dawith. |
|
56 |
Danny Coblin |
Bar de la Nuit |
Bobby Jean |
District Central |
[Discussion avec le vagabond] | Vous obtenez une dague de cristal. Apportez-la à la fontaine de la place centrale (près de l'hôtel des ventes) et essayez de donner la dague de cristal à l'un des Vagabonds Négligés. Certains ne réagissent pas du tout, vous devez donc continuer à essayer jusqu'à ce que l'un d'eux attaque. Ensuite, vous récupérez la dague de cristal et Bobby Jean apparaît. |
|
56 |
Morrok Wallinder |
District Central |
Vagabond Ike |
District Central |
[Les premières lueurs des étoiles] | Parlez à Bobby Jean et suivez-le. |
|
56 |
Vagabond Ike |
District Central |
Vagabond Ike |
District Central |
[À la recherche d'informations] | Parlez au Vagabond Ike. |
|
56 |
Morrok Wallinder |
District Central |
Morrok Wallinder |
District Central |
[Sauver l'agneau] | L'agneau est une petite fille nommée Felula Kuhio sur la gauche en direction d'Avano. Rendez-vous-y, puis Morrok apparaît et la quête est terminée. |
|
56 |
Felula Kuhio |
À l'extérieur de Dalanis vers Avano |
Felula Kuhio |
À l'extérieur de Dalanis vers Avano |
[Ça appelle à l'aide, une perle d'innocence ?] | Parlez à nouveau à la fille. Ensuite, elle s'enfuit de l'autre côté du chemin et 4 soldats arrivent d'Avano. Morrok aide au combat. Après une discussion entre eux deux, la quête est terminée. |
|
56 |
Felula Kuhio |
À l'extérieur de Dalanis vers Avano |
Lafati Kuhio |
Engwor |
[Les larmes de l'agneau ?] | Ramassez le corps d'Averia et apportez-le à Lafati Kuhio. |
|
56 |
Lafati Kuhio |
Engwor |
Lafati Kuhio |
Engwor |
[La vie en noir] | Parlez à Lafati Kuhio. |
|
56 |
Lafati Kuhio |
Engwor |
Felius Gerwent |
Pont vers Avano |
[Le pacte rompu] | Apportez la lettre à Felius Gerwent. |
|
56 |
Felius Gerwent |
Pont vers Avano |
Felius Gerwent |
Pont vers Avano |
[Le combat clé] | Parlez à Felius. Ensuite, Morrok apparaît et parle. Les deux traversent le pont avec la charrette. Lorsqu'ils atteignent l'autre côté du pont, des soldats d'Avano apparaissent et parlent. (S'ils ne viennent pas, retournez parler à Felius Gerwent.) Après la discussion, ils attaquent et le combat s'arrête avant que tout le monde ne soit mort. Ils commencent à parler. Ensuite, Morrok retraverse le pont. Suivez-le et remettez la quête. |
|
56 |
Morrok Wallinder |
Pont vers Avano |
Morrok Wallinder |
Avano |
[À Avano] |
Parlez aux personnes suivantes :
Lorsque la quête est terminée, Morrok apparaît sur la place supérieure près du feu de cuisine à côté de la maison. |
|
56 |
Morrok Wallinder |
Avano |
Morrok Wallinder |
Avano |
[Méprisable mensonge] | Parlez au Résident Aigri d'Avano, puis suivez-le. Après une courte distance, 3 soldats d'Avano apparaîtront. Continuez à courir derrière le Citoyen Aigri d'Avano jusqu'à ce qu'il s'agenouille au pied des escaliers. Combattez les soldats là-bas. Morrok aide au combat. Après le combat, Morrok prononce un discours. Vous pouvez maintenant remettre la quête. Si vous n'avez pas été assez rapide, vous devrez reparler au Citoyen Aigri. |
|
56 |
Morrok Wallinder |
Avano |
Morrok Wallinder |
Avano |
[Coup de bluff] | Vous recevez  [Couteau quelconque] dans votre inventaire. Parlez au soldat d'Avano piégé dans le poing de racines jusqu'à ce que la quête soit terminée. [Couteau quelconque] dans votre inventaire. Parlez au soldat d'Avano piégé dans le poing de racines jusqu'à ce que la quête soit terminée.Après avoir terminé la quête, vous pouvez jeter [Couteau quelconque]. |
|
56 |
Morrok Wallinder |
Avano |
Morrok Wallinder |
Avano |
[Sur la piste de Luke] |
|
|
56 |
Morrok Wallinder |
Avano |
[Freud Splinter] |
Égouts de Dalanis |
[Les égouts] | Dans les égouts, juste avant l'entrée de l'instance, vous pouvez trouver Freud Splinter. Si vous y avez été transporté, vous devez revenir un peu en arrière pour terminer la quête. |
|
56 |
[Freud Splinter] |
Égouts de Dalanis |
[Freud Splinter] |
Égouts de Dalanis |
[L'habitant des égouts] | Parlez à Freud Splinter. |
|
56 |
[Freud Splinter] |
Égouts de Dalanis |
[Freud Splinter] |
Égouts de Dalanis |
[Tout partager] | Tuez des Araignées Géantes des Égouts jusqu'à ce que vous ayez 5  [Fungus levure]. [Fungus levure]. |
|
56 |
[Freud Splinter] |
Égouts de Dalanis |
[Bikala Ambereye] |
Dalanis - District Central |
[Règle d'échange des objets] | Apportez le fromage à Bikala. |
|
56 |
[Bikala Ambereye] |
Dalanis - District Central |
[Bikala Ambereye] |
Dalanis - District Central |
[S'occuper de ses adversaires] | Parlez et combattez avec Sunmaya Ashmane. |
|
56 |
[Bikala Ambereye] |
Dalanis - District Central |
[Freud Splinter] |
Égouts de Dalanis |
[Retour de cadeau] | Ramassez 2 livres dans la pile à côté de Bikala & apportez-les à Freud Splinter. |
|
56 |
[Freud Splinter] |
Égouts de Dalanis |
[Freud Splinter] |
Égouts de Dalanis |
[Compagnons bien-aimés] |
Capturez 4 tortues.
|
|
56 |
[Freud Splinter] |
Égouts de Dalanis |
[Freud Splinter] |
Égouts de Dalanis |
[La proposition de Freud] | Buvez la potion rouge, puis la bleue et attendez que la quête soit terminée. |
|
56 |
[Freud Splinter] |
Égouts de Dalanis |
[Freud Splinter] |
Égouts de Dalanis |
[Le secret de monsieur Pipe] |
Retournez dans la pièce avec les nombreux tuyaux. Vous devez écouter à 3 tuyaux différents. Ils ont des couleurs de police différentes.
|
|
56 |
[Tuyau cassé] |
Égouts de Dalanis |
Morrok Wallinder |
Dalanis - District Central |
[Renseignements sur la base secrète] | Rendez-vous à Morrok à l'Hôtel des Ventes de Dalanis. |
|
56 |
Morrok Wallinder |
Dalanis - District Central |
Morrok Wallinder |
Dalanis - District Central |
[Allez à la forêt de Milasso] | Parlez à Morrow. Vous êtes transporté dans la Forêt de Milasso. |
|
57 |
Morrok Wallinder |
Forêt de Milasso |
Darik Silverstar |
Forêt de Milasso |
[La cérémonie avant tout] | Parlez à Darik Silverstar. |
|
57 |
Darik Silverstar |
Forêt de Milasso |
Darik Silverstar |
Forêt de Milasso |
[Soyez sur vos gardes !] | Parlez à Partrouille, qui se tient au pont menant à Medanor. |
|
57 |
Darik Silverstar |
Forêt de Milasso |
Morrok Wallinder |
Forêt de Milasso |
[Crâne de Behemoth] | Morrok Wallinder se tient en haut de l'une des tours d'observation. |
|
57 |
Morrok Wallinder |
Forêt de Milasso |
Morrok Wallinder |
Forêt de Milasso |
[Connaître le danger] | Trouvez le [Vase suspect]. Il est situé sur le côté droit du chemin, juste avant le grand plateau des Béhémoths. |
|
57 |
Morrok Wallinder |
Forêt de Milasso |
Morrok Wallinder |
Forêt de Milasso |
[Étrange parfum] | Parlez à Darik Silverstar. |
|
57 |
Morrok Wallinder |
Forêt de Milasso |
Morrok Wallinder |
Forêt de Milasso |
[Comment éviter le combat] | Parlez à Darik Silverstar. |
|
57 |
Morrok Wallinder |
Forêt de Milasso - Autre côté de la petite rivière |
Morrok Wallinder |
Forêt de Milasso |
[La même chose] | Collectez 3  [Souffle d'Altus]. Lors de la cueillette, vous devez faire attention à ne pas vous faire attraper par le Béhémoth qui court partout. [Souffle d'Altus]. Lors de la cueillette, vous devez faire attention à ne pas vous faire attraper par le Béhémoth qui court partout. |
|
57 |
Morrok Wallinder |
Forêt de Milasso |
Morrok Wallinder |
Forêt de Milasso |
[Expérience sur sujet vivant] |
|
|
57 |
Morrok Wallinder |
Forêt de Milasso |
Morrok Wallinder |
Forêt de Milasso |
[Production de masse] | Collectez 12 Souffle d'Altus. Lors de la cueillette, vous devez faire attention à ne pas vous faire attraper par le Béhémoth qui court partout. |
|
57 |
Morrok Wallinder |
Forêt de Milasso |
Morrok Wallinder |
Crâne de Béhémoth |
[Apparences trompeuses] | Vous recevez  [Armure travaillée] dans votre inventaire. Morrok se tient, également en armure raffinée, à peu près au milieu sous le crâne de Béhémoth. Allez-y à cheval, enfilez « Armure Traitée ». [Armure travaillée] dans votre inventaire. Morrok se tient, également en armure raffinée, à peu près au milieu sous le crâne de Béhémoth. Allez-y à cheval, enfilez « Armure Traitée ». |
|
57 |
Morrok Wallinder |
Crâne de Béhémoth |
Morrok Wallinder |
À côté de la cage de Delany Silverstar |
[Plan d'attaque !] | Retrouvez Darik Silverstar. Il est au début du chemin menant au camp Silverstar. Parlez et remettez la quête à Morrok. |
|
57 |
Morrok Wallinder |
Crâne de Béhémoth |
Morrok Wallinder |
Crâne de Béhémoth |
[Attaque-surprise] | Parlez à Morrok. |
|
57 |
Morrok Wallinder |
Crâne de Béhémoth |
Morrok Wallinder |
Forêt de Milasso |
[Douteux] | Morrok Wallinder apparaît à la tente du chef de Darik Silverstar. |
|
57 |
Morrok Wallinder |
Forêt de Milasso |
[Simon Dibark] |
Salle du trône à Dalanis |
[Devoir] | Terminez la quête. |
|
57 |
Morrok Wallinder |
Dalanis - District Central |
Morrok Wallinder |
Forêt de Janost du Sud |
[Aller à la Forêt de Janost] | Parlez à Morrok deux fois. Ensuite, il vous téléporte dans la Forêt de Janost du Sud. |
Forêt de Janost du Sud

|
Niveau |
Donneur de quête |
Lieu |
Récepteur de quête |
Lieu |
Objet de jeu |
Infos |
|---|---|---|---|---|---|---|
|
57 |
Morrok Wallinder | Au sud du Camp Arde | Morrok Wallinder | Camp Arde | [Retrouver Arde] | Parlez à Morrok. Ensuite, vous êtes téléporté au Camp Arde. |
|
57 |
Slater Dazzlebright | Camp Arde | Slater Dazzlebright | Camp Arde | [La demande de Slater] | Tuez des Gulos Timides et collectez 8  [Viande de gulo]. [Viande de gulo]. |
|
57 |
Arde Silverstar | Camp Arde | Arde Silverstar | Camp Arde | [La Joie de vivre] | Obtenez du Vin du tonneau à côté d'Arde et donnez-le-lui. |
|
57 |
Arde Silverstar | Camp Arde | Arde Silverstar | Camp Arde | [Le Message des étoiles] | Parlez à Arde. |
|
57 |
Arde Silverstar | Camp Arde | Morrok Wallinder | À l'ouest du Camp Arde | [L'étoile de l'Émir] | Allez à l'ouest du Camp vers le bâtiment blanc. Ensuite, allez un peu vers la cascade. Il y a une courte scène de jeu où vous n'avez rien à faire. À la fin de la scène, Morrok Wallinder apparaît et la quête est terminée. |
|
57 |
Cadavre étrange | À l'ouest du Camp Arde | Morrok Wallinder | À l'ouest du Camp Arde | [Cadavre étrange] | Acceptez et terminé. |
|
57 |
Morrok Wallinder | À l'ouest du Camp Arde | Arde Silverstar | Camp Arde | [Investigation interrompue] | Acceptez et terminé. |
|
57 |
Arde Silverstar | Camp Arde | [Flod Var] | Shador | [Avertissement à Shador] | Vous avez un  [Lettre] dans votre inventaire. Acceptez et terminé. [Lettre] dans votre inventaire. Acceptez et terminé. |
|
57 |
Morrok Wallinder | Shador | Morrok Wallinder | Kandor | [Enquête sur les griffures] | Vous recevez  [Moule de griffure] dans votre inventaire. [Moule de griffure] dans votre inventaire.À Kandor, parlez au Résident de Kandor (petit garçon) debout à côté du marchand de vêtements Madelin Lenon. |
|
58 |
Morrok Wallinder | Kandor | Morrok Wallinder | Sur une île derrière Kandor | [Karebas, le premier messager des dragons ?] | Sur l'île « Terre Sacrée du Titan », cliquez sur la Tablette de Pierre Brisée. Écoutez la conversation. Quête terminée. |
|
58 |
Morrok Wallinder | Sur une île derrière Kandor | Belle Allen | Kandor | [Potion de la femme étrange] | Vous recevez  [Potion] dans votre inventaire, que vous devez remettre à Belle Allen. [Potion] dans votre inventaire, que vous devez remettre à Belle Allen. |
|
58 |
Belle Allen | Kandor | Belle Allen | Kandor | [Fleur sanguinaire] | Tuez 5 Janost Dents-de-Sabre et plantez leur sang dans le Sol Fertile. Ensuite, les fleurs sortent et vous attaquent immédiatement. À l'extrémité sud de Kandor, il y a 2 parcelles de terre. |
|
58 |
Belle Allen | Kandor | Kyle Saaj | Kandor | [Déposer les armes] |
À la hutte de Belle Allen
Remettez-le à Kyle Saaj. |
|
58 |
Kyle Saaj | Kandor | Grande Boîte en Bois | Kandor | [Le secret dans la boîte] | Vous recevez un  [Note] et [Potion] dans votre inventaire. À quelques mètres au sud-est de Kyle Saaj, vous pouvez trouver une petite caisse en bois. Cliquez dessus et placez la note et la potion à l'intérieur. Ensuite, vous verrez un texte rouge et un papillon de vigne sanguine apparaîtra et vous attaquera immédiatement. Tuez-le et cliquez à nouveau sur la caisse. [Note] et [Potion] dans votre inventaire. À quelques mètres au sud-est de Kyle Saaj, vous pouvez trouver une petite caisse en bois. Cliquez dessus et placez la note et la potion à l'intérieur. Ensuite, vous verrez un texte rouge et un papillon de vigne sanguine apparaîtra et vous attaquera immédiatement. Tuez-le et cliquez à nouveau sur la caisse. |
|
58 |
Grande Boîte en Bois | Kandor | Grande Boîte en Bois | Kandor | [Le plan d'Aguda] |
Vous recevrez « Vêtements Particuliers » et
|
|
58 |
Grande Boîte en Bois | Kandor | Kyle Saaj | Kandor | [La vérité au grand jour] | Vous recevez  [Grand sac de toile] dans votre inventaire. Remettez-le à Kyle Saaj. [Grand sac de toile] dans votre inventaire. Remettez-le à Kyle Saaj. |
|
58 |
Kyle Saaj | Kandor | Kyle Saaj | Kandor | [La confession de Kyle] | Vous recevez  [Fragment de pierre protectrice] dans votre inventaire. Vous devez l'enterrer près du titan. Ensuite, Lakodi Neton vient vous parler. [Fragment de pierre protectrice] dans votre inventaire. Vous devez l'enterrer près du titan. Ensuite, Lakodi Neton vient vous parler. |
|
58 |
Morrok Wallinder | Kandor | Morrok Wallinder | Sur le chemin de Bymorsh | [Un message inattendu] | Suivez le chemin vers les Ruines de Bymorsh. À la hauteur de la Vallée de Chupura, Morrok, un dragon, un cadavre et un autre PNJ apparaîtront. Attendez simplement que la quête soit terminée. |
|
58 |
Morrok Wallinder | Sur le chemin de Bymorsh | Morrok Wallinder | Sur le chemin du Tombeau d'Alimus | [Suivez les indices] | Suivez le chemin vers les Ruines de Bymorsh jusqu'à ce que vous voyiez le message « Un bruit étrange vient des environs ». Arrêtez-vous immédiatement et attendez que la « Créature Étrange » arrive. La créature attaque et dès que vous l'avez tuée, Morrok apparaît. |
|
58 |
Morrok Wallinder | Sur le chemin du Tombeau d'Alimus | Morrok Wallinder | À l'entrée du Tombeau d'Alimus | [Sur la trace d'une étrange créature] | Courez jusqu'à l'entrée du tombeau. |
|
58 |
Morrok Wallinder | À l'entrée du Tombeau d'Alimus | Morrok Wallinder | À l'entrée du Tombeau d'Alimus | [Manticos le dragon] | Parlez à Morrok. |
|
58 |
Morrok Wallinder | À l'entrée du Tombeau d'Alimus | Briel Delaman | À l'intérieur du Tombeau d'Alimus | [Séparons-nous] | Continuez le long du chemin. Briel Delaman est assis sur la droite (semi-transparent). Parlez-lui, puis ramassez le petit paquet posé sur les escaliers et donnez-le à Briel Delaman. |
|
58 |
Briel Delaman | À l'intérieur du Tombeau d'Alimus | Briel Delaman | À l'intérieur du Tombeau d'Alimus | [La récupération du cristal d'enregistrement] | Descendez les escaliers puis ramassez le cristal sur la droite et donnez-le à Briel Delaman. |
|
58 |
Morrok Wallinder | À l'intérieur du Tombeau d'Alimus | Morrok Wallinder | Camp des Chercheurs de Tombes | [Une aventure urgente] | Avancez plus profondément dans le tombeau. Dès que vous entrez dans le bon niveau, un combat commence. Vous devez éliminer les ennemis le plus rapidement possible. Si vous êtes trop lent, les ennemis disparaîtront et la quête ne sera pas terminée. Vous devrez alors quitter le niveau et y entrer à nouveau. |
|
58 |
Morrok Wallinder | Camp des Chercheurs de Tombes | Morrok Wallinder | Camp des Chercheurs de Ruines | [Rencontre avec des amis] | Quête terminée. |
|
58 |
Morrok Wallinder | Camp des Chercheurs de Ruines | Morrok Wallinder | Ruines de Bymorsh | [D'étranges bruits au campement abandonné] | Allez au fond des Ruines de Bymorsh. Attendez qu'ils aient fini de parler. |
|
58 |
Morrok Wallinder | Ruines de Bymorsh | Morrok Wallinder | Ruines de Bymorsh | [Préparatifs particuliers] | Collectez 5 Slimes des Sigg Lurker. |
|
58 |
Morrok Wallinder | Ruines de Bymorsh | Morrok Wallinder | Camp des Chercheurs de Ruines | [La véritable identité du fantôme] |
Vous recevez
|
|
58 |
Morrok Wallinder | Camp des Chercheurs de Ruines | Eliba Hill | Camp des Chercheurs de Ruines | [Un bref répit] | Apportez la lettre à Eliba Hill. |
|
58 |
Eliba Hill | Camp des Chercheurs de Ruines | Eliba Hill | Camp des Chercheurs de Ruines | [Fouilles archéologiques] |
Les inscriptions se trouvent dans les ruines de l'autre côté du chemin. Coordonnées :
Vous avez 5 minutes pour toutes les trouver. Si le minuteur expire, vous pouvez obtenir un autre buff d'Eliba. |
| 58 | Eliba Hill | Camp des Chercheurs de Ruines | Eliba Hill | Camp des Chercheurs de Ruines | [Explication des mystérieuses inscriptions] | Obtenez d'abord les inscriptions du « Dispositif d'Analyse » sur la fiole d'alchimie, puis cliquez sur les autres dispositifs d'analyse jusqu'à ce que tout ait été analysé. |
| 58 | Eliba Hill | Camp des Chercheurs de Ruines | [Borick Lannis] | Camp des Chercheurs de Tombes | [Hyrdon le Vorace] | Quête terminée |
| 58 | [Borick Lannis] | Camp des Chercheurs de Tombes | Eliba Hill | Camp des Chercheurs de Ruines | [Conversation avec l'esprit] | Parlez au dragon fantôme à côté de Borick Lannis. |
| 58 | Eliba Hill | Camp des Chercheurs de Ruines | Morrok Wallinder | Camp des Chercheurs de Ruines | [Le retour de Morrok] | Parlez à Morrok. |


Forêt de Janost du Nord

|
Niveau |
Donneur de quête |
Lieu |
Récepteur de quête |
Lieu |
Objet de jeu |
Infos |
|---|---|---|---|---|---|---|
|
58 |
Morrok Wallinder | Camp des Chercheurs de Ruines | Morrok Wallinder | Laboratoire Oublié | [Forêt Septentrionale de Janost] | Parlez à Morrok et cliquez sur « Je suis prêt ». Il vous téléporte dans la Forêt de Janost du Nord. |
|
58 |
Morrok Wallinder | Laboratoire Oublié | Morrok Wallinder | Laboratoire Oublié | [Le piège] | Cueillez les fleurs. |
|
58 |
Morrok Wallinder | Laboratoire Oublié | Morrok Wallinder | À l'intérieur du Laboratoire Oublié | [Captifs volontaires] | Vous ne devez pas quitter le cercle bleu autour de Morrok après avoir accepté la quête ! Parlez à nouveau à Morrok. Commencez par « Je suis prêt ». Restez simplement immobile et attendez que la quête soit terminée. |
|
58 |
Morrok Wallinder | À l'intérieur du Laboratoire Oublié | Morrok Wallinder | À l'intérieur du Laboratoire Oublié | [Crois-moi, mon enfant.] | Parlez à Morrok. Vous êtes téléporté dans le laboratoire. Attendez que la quête soit terminée. |
|
58 |
Morrok Wallinder | À l'intérieur du Laboratoire Oublié | Morrok Wallinder | Sley | [De passage à Sley] | Quête terminée. |
|
58 |
Morrok Wallinder | Sley | Morrok Wallinder | Sley | [La famille d'Ayekin] | Parlez à Morrok. |
|
58 |
Morrok Wallinder | Sley | Morrok Wallinder | Sley | [Sang de dentranchante] | La plante Sang de Dents-de-Sabre pousse à la lisière nord de Sley. Collectez-en 5. |
|
58 |
Morrok Wallinder | Sley | Thomas Hanks | Sley | [Thaumaturge à mi-temps] | Parlez à Morrok. Commencez par « Je suis prêt ». Dès que l'invite blanche de Morrok Wallinder « Allez ! » apparaît dans la fenêtre de discussion, vous devez cliquer sur l'enfant. |
|
58 |
Thomas Hanks | Sley | Morrok Wallinder | Bois de Croso | [Air raréfié] | Prenez le chemin vers le nord hors du village. Lorsque vous atteignez « Bois de Croso », le brasero est droit devant, devant un arbre. Cliquez sur le brasero et attendez la scène de jeu entre Morrok et Thomas Hanks. |
|
58 |
Morrok Wallinder | Bois de Croso | Morrok Wallinder | Bois de Croso | [Porte-à-porte] | Parlez à 3 Résidents de Zaramonde. |
| 59 | Morrok Wallinder | Bois de Croso | Morrok Wallinder | Bois de Croso | [Mesures désespérées] | Parlez au Fonctionnaire de Zaramonde et battez-le. Quelques gardes apparaîtront. Tuez les gardes et reparlez au Fonctionnaire. Maintenant, plus aucun garde ne vient et vous pouvez abattre le Fonctionnaire jusqu'à ce que la quête soit terminée. |
| 59 | Morrok Wallinder | Bois de Croso | Morrok Wallinder | Repaire des Voleurs de la Tempête | [Aube d'été] | Traversez Zaramonde pour monter sur la montagne. |
| 59 | Morrok Wallinder | Repaire des Voleurs de la Tempête | Morrok Wallinder | Repaire des Voleurs de la Tempête | [Nouveau rendez-vous avec Loub] | Parlez à Loub. |
| 59 | Morrok Wallinder | Repaire des Voleurs de la Tempête | [Prisonnier étrange] | Dans la Caverne | [De drôles de détenus] | Quête terminée. |
| 59 | [Prisonnier étrange] | Dans la Caverne | Morrok Wallinder | Repaire des Voleurs de la Tempête | [De l'art de s'adresser aux gens] | Faites rôtir 1 viande de loup ou d'aigle sur le feu de camp et donnez-la au prisonnier. |
| 59 | Morrok Wallinder | Repaire des Voleurs de la Tempête | Morrok Wallinder | Repaire des Voleurs de la Tempête | [Feuilles de soleil intense] | Collectez 5 feuilles. |
| 59 | Morrok Wallinder | Repaire des Voleurs de la Tempête | Morrok Wallinder | Repaire des Voleurs de la Tempête | [M. Duran] | Vous recevez  [Vin doux de feuille de soleil intense] dans votre inventaire. Donnez le vin à M. Duran. [Vin doux de feuille de soleil intense] dans votre inventaire. Donnez le vin à M. Duran. |
| 59 | Morrok Wallinder | Repaire des Voleurs de la Tempête | Morrok Wallinder | Repaire des Voleurs de la Tempête | [Aucun respect pour les anciens] | Lorsque vous avez la caverne derrière vous : longez le mur à gauche, derrière le premier rocher se trouve Kargath Duran. Parlez à Kargath Duran puis attendez. |
| 59 | Morrok Wallinder | Repaire des Voleurs de la Tempête | Morrok Wallinder | Repaire des Voleurs de la Tempête | [Vendetta] | Cliquez sur le feu de camp. |
| 59 | Morrok Wallinder | Repaire des Voleurs de la Tempête | Morrok Wallinder | À l'extérieur de Zaramonde | [Retour à Zaramonde] | Quête terminée. |
| 59 | Morrok Wallinder | À l'extérieur de Zaramonde | Morrok Wallinder | Bois de Croso | [L'alcool délie les langues] | Vous recevez [Vin doux de feuille de soleil intense] dans votre inventaire. Frappez Mendoza à 50%, puis faites un clic droit sur le vin et parlez à Mendoza. |
| 59 | Morrok Wallinder | Bois de Croso | Morrok Wallinder | Bois de Croso | [Fusée éclairante] | Vous recevez  [Signal de fumée] dans votre inventaire. Éloignez-vous d'environ 10 mètres de Morrok, puis faites un clic droit sur les signaux de fumée, puis revenez vers Morrok. [Signal de fumée] dans votre inventaire. Éloignez-vous d'environ 10 mètres de Morrok, puis faites un clic droit sur les signaux de fumée, puis revenez vers Morrok. |
| 59 | Morrok Wallinder | Bois de Croso | Morrok Wallinder | Laboratoire Caché | [Une nouvelle piste] | Rendez-vous au laboratoire et parlez à Morrok. |
| 59 | Morrok Wallinder | Laboratoire Caché | Morrok Wallinder | Laboratoire Caché | [La Main de la vérité] | Vous recevez « Déguisement » dans votre inventaire. Le bâtiment au nord de Morrok a une lueur bleue à l'entrée. Dès que vous avez enfilé le déguisement en faisant un clic droit, la lueur disparaît et vous pouvez entrer dans le bâtiment. Il y a un bureau au sous-sol avec un PNJ devant. Récupérez les « Papiers Éparpillés » et remettez-les à Morrok. |
| 59 | Morrok Wallinder | Laboratoire Caché | Kargath Duran | Laboratoire Caché | [Embuscade] | Parlez à Morrok. Ensuite, plusieurs ennemis apparaissent. Tuez-les tous. Ensuite, Morrok dit à Loub d'aller derrière la maison. Loub se tient alors derrière le bâtiment. Parlez à Loub : « Je suis prêt ». Ensuite, vous êtes transporté de retour au repaire des voleurs de la tempête. |
Attention : Avant de continuer cette série de quêtes, vous devez d'abord faire Rendre la Gloire.
|
Niveau |
Donneur de quête |
Lieu |
Récepteur de quête |
Lieu |
Objet de jeu |
Infos |
|---|---|---|---|---|---|---|
| 61 | Kargath Duran | Repaire des Voleurs de la Tempête | Kargath Duran | Repaire des Voleurs de la Tempête | [Vieil adage] | Obtenez 6 Larmes d'Aigle, puis parlez à Loub. |
| 61 | Morrok Wallinder | Repaire des Voleurs de la Tempête | Morrok Wallinder | Repaire des Voleurs de la Tempête | [Un lieu de guérison secret] | Parlez à Morrok. Cliquez sur « Je suis prêt » pour être téléporté dans le Désert de Limo. |
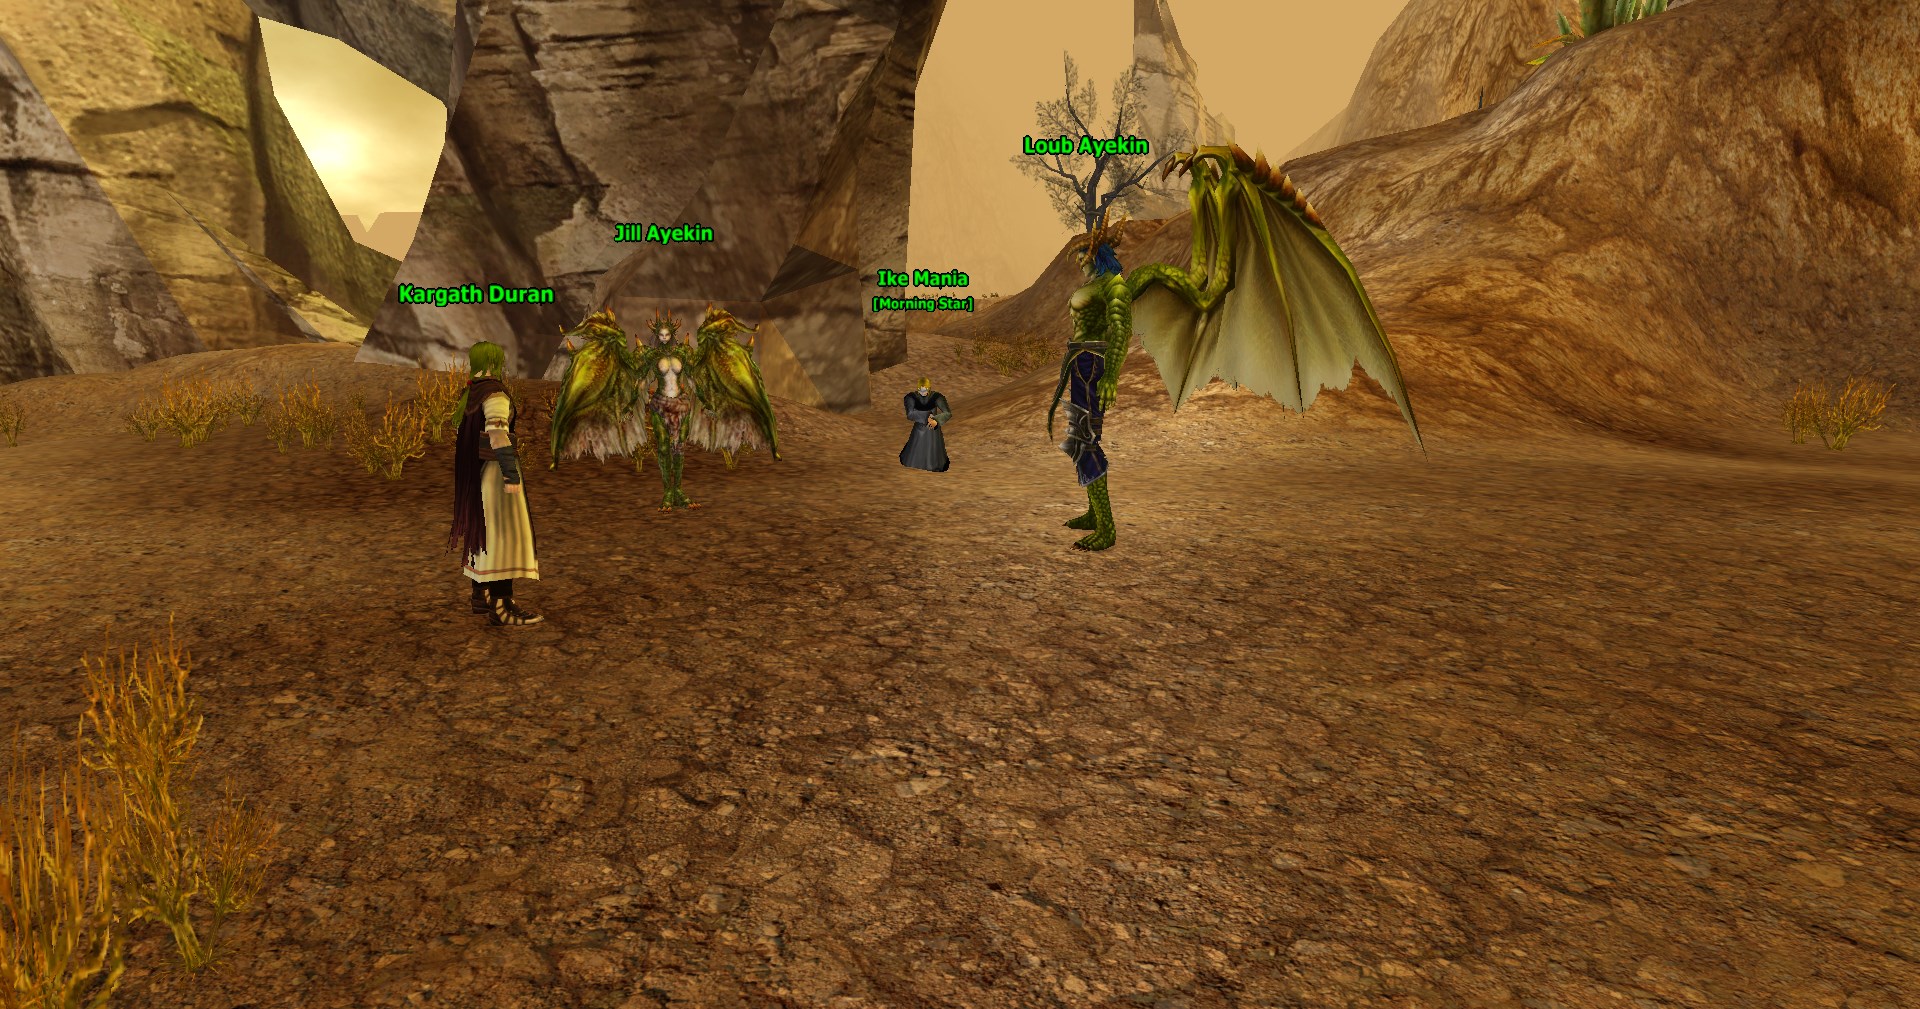
Désert de Limo
|
Niveau |
Donneur de quête |
Lieu |
Récepteur de quête |
Lieu |
Objet de jeu |
Infos |
|---|---|---|---|---|---|---|
| 61 | Morrok Wallinder | Devant la caverne | Kargath Duran | À l'intérieur de la caverne | [Écouter aux portes, tout un art] | Parlez à nouveau à Morrok puis attendez. |
| 61 | Kargath Duran | À l'intérieur de la caverne | Kargath Duran | À l'intérieur de la caverne | [Un expert en distribution de matériel] |
Collectez :
Le |
| 61 | Loub Ayekin | À l'intérieur de la caverne | [Katie Jean] | Tomard | [L'amour de Jill] | Apportez-le simplement à Katie Jean. |
| 61 | [Katie Jean] | Tomard | Kargath Duran | À l'intérieur de la caverne | [Le cadeau de Katie] | Apportez-le simplement à Kargath Duran. |
| 61 | Kargath Duran | À l'intérieur de la caverne | Kargath Duran | À l'intérieur de la caverne | [S'affirmer] | Parlez à Kargath puis suivez-le. |
| 61 | Kargath Duran | À l'intérieur de la caverne | Kargath Duran | Tomard | [À la recherche d'informations] |
Ces PNJ donnent les informations :
Ensuite, parlez à Kargath Duran, attendez la conversation entre Morrok Wallinder et Catherine Wallinder. |
| 61 | Kargath Duran | Tomard | Jill Ayekin | Camp de la Main de la Vérité | [Ingrédients pour poison] | Collectez le poison au Camp de la Main de la Vérité. |
| 61 | Loub Ayekin | Camp de la Main de la Vérité | Kargath Duran | Camp de la Main de la Vérité | [Comment sauver un gentilhomme] | Parlez à Kargath, puis collectez 5 x Herbe de Feuille de Printemps et reparlez à Kargath. |
| 61 | Ike Mania | Camp de la Main de la Vérité | Louis Dell | Au sud du Camp de la Main de la Vérité | [À la rencontre de Louis] | Trouvez Louis à [50.4/61.6]. |
| 61 | Louis Dell | Au sud du Camp de la Main de la Vérité | Louis Dell | Au sud du Camp de la Main de la Vérité | [Au commencement, le cœur] | Revenez le long du chemin et prenez un virage serré à droite au premier niveau [54.4/62.4]. Tuez-les. |
| 61 | Louis Dell | Au sud du Camp de la Main de la Vérité | Louis Dell | Au sud du Camp de la Main de la Vérité | [Se préparer à interrompre l'expérience] | Collectez 5 x Organe Interne de Vipères. |
| 61 | Louis Dell | Au sud du Camp de la Main de la Vérité | Morrok Wallinder | Camp de la Main de la Vérité | [Interrompre l'expérience] |
Vous recevez un Attention : Parfois, cela prend une éternité et rien ne se passe. Il est alors parfois utile d'aider Yusallien à tuer ses agresseurs. Et puis de revenir rapidement au Poêle de Laboratoire. |
| 61 | Kargath Duran | Camp de la Main de la Vérité | Kargath Duran | Dune de Zanka | [Lieu de l'accident] | Parlez à Kargath. |
| 61 | Morrok Wallinder | Dune de Zanka | Morrok Wallinder | Dune de Zanka | [Indices pour l'expérience du Roi Dragon] | Depuis Morrok, dirigez-vous vers l'ouest jusqu'à atteindre un petit pont. Sautez du pont. Il y a une Colonne de Rune de Pierre Inhabituelle et un parchemin appelé [Donnée expérimentale du Roi Dragon]. Dès que vous ramassez le parchemin, Larvanger Barkud arrive avec plusieurs compagnons, qui attaquent après une brève discussion. Morrok Wallinder rejoint le combat. Ensuite, les adversaires disparaissent. Retournez à Morrok. |
| 61 | Kargath Duran | Dune de Zanka | Kargath Duran | Dune de Zanka | [Mémoire de Kargath] | Vous recevez une Gemme Spéciale dans votre inventaire. Courez dans la caverne et cliquez sur le premier cristal bleu. Attendez la fin de la scène et dirigez-vous vers le cristal suivant. |
| 61 | Morrok Wallinder | Dune de Zanka | Geddleman Ton | Tomard | [Un autre type d'indice] | Rendez-vous à Tomard. |
| 61 | Geddleman Ton | Tomard | [Crocker Saboferré] | Camp de Recherche de la Main Brisée | [Urgence] | Collectez 5 x Estomac de Yasheedees et allez voir Iron Heel Crocker. |
| 61 | Kargath Duran | Camp de Recherche de la Main Brisée | Kargath Duran | Camp de Recherche de la Main Brisée | [Langlokee et la Main brisée] | Parlez à Kargath. |
| 61 | Morrok Wallinder | Camp de Recherche de la Main Brisée | Morrok Wallinder | Camp de Recherche de la Main Brisée | [Obtenir les rapports d'expérience] | Collectez 5 x Notes de Recherche auprès des Chercheurs près du Camp. |
| 61 | Kargath Duran | Camp de Recherche de la Main Brisée | Jill Ayekin | Près du Camp de Recherche de la Main Brisée | [Réunion...] | Tuez des Tortues à Ondulations de Sable et obtenez 5 x Carapace de Tortue. Allez voir Jill. |
| 61 | Ike Mania | Près du Camp de Recherche de la Main Brisée | Ike Mania | Près du Camp de Recherche de la Main Brisée | [Fouille approfondie] | Parlez à Ike. |
| 61 | Ike Mania | Près du Camp de Recherche de la Main Brisée | Safir Shaquapuh | Dalanis | [En quête d'aide] | Apportez la lettre à Safir. |
| 61 | Jill Ayekin | Dune des Cieux | Jill Ayekin | Dune des Cieux | [Piège] | Collectez 5 x Salpêtre. |
| 61 | Kargath Duran | Dune des Cieux | Kargath Duran | Dune des Cieux | [L'agneau sacrifié] | Vous recevez 2 explosifs dans votre inventaire. Parlez à nouveau à Kargath Duran et il vous transporte. Attendez la fin de la scène et rejoignez le combat. Cliquez sur le soldat qui combat et l'explosif dans votre inventaire. Après un moment, les ennemis disparaissent et vous êtes transporté de retour. |


